Step 2: The Gear, Part 3 - Farkles
With the majority of the camping gear acquired (read here to see how I broke up the list into manageable parts) it's time to move to address a more interesting part of adventure riding: FARKLES! These mods come in a variety of flavors, give one's ride a little personal touch and (in theory) help to improve the ride along the way.
 Levers: To kick things off, I replaced the levers with a pair of fully adjustable and collapsible levers. While this was a necessary mod (the previous lever was snapped) it's also supposed to - in theory - fold up and out of the way in the event of an "off" instead of smashing into little pieces so that you can still brake & clutch after going sideways. I have no doubt I'll test this theory...
Bar Risers: This next mod shouldn't be necessary but, unfortunately, is a requirement for giants such as myself since these rides are made for the average person. When standing on the pegs these risers should put the controls within reach and high up enough to maintain control (at least until I ride far above my skill level). These are also coupled with the next farkle to put my stance into a more reasonable position.

Crash Bars: The XCA does come with a really nice set of lower crash bars from the factory. In reviews that I've read the stock kit should protect well in the event that the rubber does not meet the road but I felt that, particularly for a noob like myself, a little more protection was necessary so opted for a set of HEED upper crash bars. The kit protects well and contains everything that's needed to install them (bolts, spacers, etc.). They fit really well (at least when you put the spacers in the right place...) but they are not without a few challenges. The first being the packaging - which I can't fault them for being that they manufacture in, and ship from, Poland. Every square inch of surface was wrapped in two layers of foam, tape, cardboard, plastic and shrink-wrap. Nice job guys! The other challenge was the center attachment to the frame and what a major SOB this was! The u-bolt that ties to the frame sits right behind the stock horn and it was IMPOSSIBLE to tighten the bolts on this piece. I tried taking the horn off, the fairing off, the wiring harness - all to no avail. In the end I basically had to loosen up all the bolts, tape the nuts and washers to a VERY long ratchet extension and hope for the best. Eventually I was able to get it all buttoned up but what a chore! Fortunately this set comes with a set of water-resistant pouches which appear small but are plenty large for emergency tools such as spare tire tubes, patch kit, rags, first-aid kit and plenty of other gear.
 |
| HEED Crash Bars - The Unpacking Process |
 |
| Tiger 800 XCA with HEED Upper Crash Bars |
Exhaust: Some may say that this next mod is unnecessary but I beg to differ. While a new silencer may not relinquish any discernible performance it does certainly add noise. Illegal you might say? Maybe - but I'd rather make a little more noise and be heard while riding through traffic than to be both invisible and silent. Any experienced city rider can attest that cagers just don't see bikes. With as many times as I've nearly been cut-off, sideswiped, and nearly plowed into - plus the one time I actually was - anything I can do to get someone to look up off and get off their phone for a moment is a step in the right direction. If I have to pay a noise ordinance violation because of it; so be it!
For this modification I selected the MIVV exhaust. It's a much lighter alternative than the stock can and, with the baffle removed, has a wonderful low-end grunt that lets the 3-cyl. mill of the Triumph really sing. Check out the video here, or play the soundtrack embedded here.
For this modification I selected the MIVV exhaust. It's a much lighter alternative than the stock can and, with the baffle removed, has a wonderful low-end grunt that lets the 3-cyl. mill of the Triumph really sing. Check out the video here, or play the soundtrack embedded here.
 Panniers: While the panniers themselves are a relatively standard addition, I've taken mine to the next level. The bike came with a set of Givi 37 liter Trekker Outback side cases which, incidentally, are identical to the Triumph OEM bags with the exception of the locks and badges. While Givi does make an optional elastic cargo net for the lids they want far too much coin for them. My cheap-ass alternative was to spend just a hair more than $7 on a spool of shock-cord and make my own. The process was tedious but relatively easy. I used a piece of scrap wood and a handful of screws and went to work tying knot after knot after knot after knot after knot... The result may not look quite as elegant as the OEM version but my concoction has a tighter webbing, uses smaller cord and is WAY cheaper. Check out the photo's below of the finished product.
The next part of this mod was significantly more work but it turned out great!
 Picture this: you're out on the trails after a long day of riding, the sun has recently evaded the horizon and you're ready to setup camp for the night. You find a site fit for a tent and pop open your panniers to locate the necessary gear - but it's dark and all the black stuff-sacks encapsulating your gear meld together into a single black mass within your luggage. Or maybe you're traveling along at night, churning through the miles when you have to stop at the side of the road to repair your ride, take a bio-break, snag a snack or grab some different gear. Peel the lids off your luggage and it's impossible to see what's what so you whip out your trusty cell-phone and flick on the flashlight to fumble through your luggage with only one hand. Functional? Maybe. Can you make it work? Sure, but I have to over-engineer everything so I added automated LED lighting to my cases. But I couldn't stop there: holding true to my old college mantra "overly complicated and prone to breakage" I also felt that it was necessary to add USB charge ports and a 12v outlet as well. Because - why not!
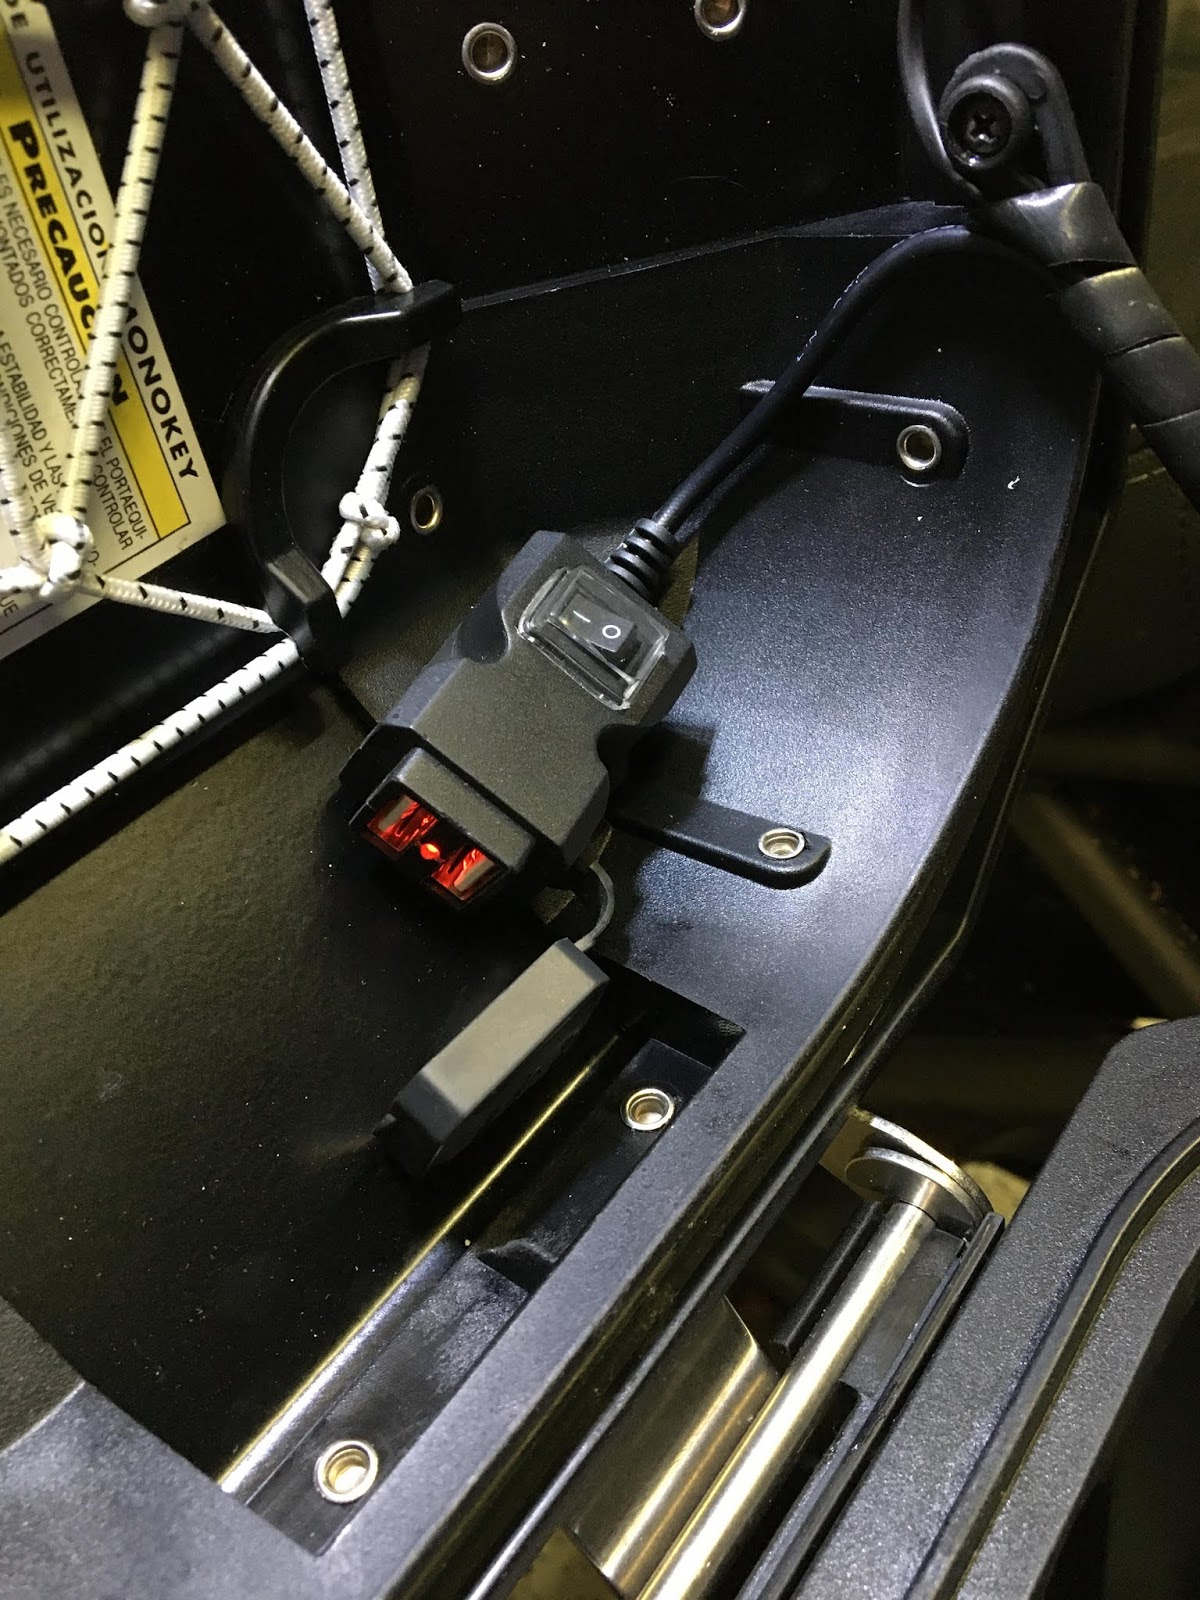
After several weeks of soldering my panniers now have a full set of lights, 12v outlet and dual USB charge ports so that I can charge all my camping gear (flashlights, air pump, batteries, mobile electronics, etc.) during the day. I can't go into too much detail about how I did this (patent pending) but the solution is waterproof and touchless. The cases get electrified as soon as they are clipped into the racks and require no manual plugs, wires or cords. Open the lids and voila! Let there be light! No fumbling for switches or searching for power. The USB ports are integral with the ignition (to avoid accidentally draining the battery overnight) while the lights are tied to the battery circuit and can sense when open or closed. The results were stunning - the last picture below shows the lights in my shop, at night, with no other light sources. Is it all overkill? Yes. But I don't care! It's awesome!!
 |
| GIVI Trekker Outback |
 |
| Cargo Net Installed |
 |
| LED Internal Pannier Lights |
 |
| Pannier Lights inside Shop - no other light sources present |
 |
| Tiger 800 with Givi Trekker Panniers and Givi V40NT top case |
GPS Mount: This next mod adds a mount for my Garmin GPS. It relocates the unit to just above the gauge cluster. For this one I selected an Evotech Performance GPS mount and paired it with a Garmin Zumo 396LMT. Nothing too exciting here but wiring it was fun and required taking off most of the fairings. As with the panniers, I opted to make this as professional as possible by encasing all the wires inboard of the frame and encapsulating everything in vinyl tubing. To the untrained eye you can't tell it apart from the OEM harness!

 |
| Evotech Performance GPS Mount for Garmin Zumo 396LMT |
Fuel and Water Canisters: This next addition hasn't been finished yet but, once complete, will add a 1-gallon fuel canister and a 1-gallon potable water canister. For these I've selected the Rotapax option. Fitting these could be a challenge since space is limited but for the deep-woods riding that we plan to do up in Canada these could be essential pieces of kit.
That's the list of mods so-far. I'm sure there will be more so check back later to see the progress. Next up - riding gear!


Comments
Post a Comment
Comments are moderated. Only approved content will be shown.